Wednesday 18 September 2013

Review: Garden of Life Raw Organic Meal - Chocolate

Recently, due to my increasing difficulty in eating a lot of food, I decided to try out a meal replacement drink. Now previously I would have probably bought a dairy based meal replacement - like Complan (in the UK), but being more clued up to a healthy lifestyle, this time I decided to see if I could find a product that did not have allergens in it such as dairy and gluten. What I discovered was even better than that...

Garden of Life make a number of really nice looking products, and going by other reviews their products are high quality and fit in with my lifestyle choices. When looking for a meal replacement, I was ideally looking for something that would be highly nutritious and would act as an instant tonic to my body - similar if possible to the experience I get when I drink fresh juice. What's good about liquid based products is the tend to be easily and quickly absorbed/utilised by my body.

Garden of Life Raw Organic Meal - Chocolate
In the UK it's hard to get hold of the Garden of Life meal replacements, but I managed to find the 'chocolate' version on Amazon UK. If you are in the US then you will have a far wider variety available to you, including the interesting sounding: Vanilla Chai.

Here's the blurb about the one I bought:
Garden of Life Raw Meal was formulated to be a meal replacement that satisfies hunger, is naturally filling and provides energy, all while providing the protein, fiber, vitamins and minerals that you would find in a healthy meal of raw foods. Raw Meal provides the nutrition of a well-balanced, healthy raw meal in one delicious serving. Why choose raw meal. Raw meal goes beyond organic by providing live probiotics and enzymes, vitamin code raw food created vitamins and minerals, as well as nutrient Code Factors such as beta-glucans, SOD, glutathione and CoQ10, enabling natural recognition by your body. Containing 26 superfoods from Raw organic seeds, sprouts and greens, RAW Meal provides 34 grams of protein, 9 grams of fiber and a healthy 2.5 grams of fat making it an excellent choice for weight conscious individuals. RAW Meal also offers 20 Vitamin Code vitamins and minerals providing at least 100% of the Daily Value of 16 key nutrients. Just as important is what's not included in RAW Meal. It is gluten-free, dairy-free and lactose-free. It has no fillers, no isolates, no synthetic nutrients, no artificial sweeteners and no preservatives.
http://www.amazon.com/Garden-Life-Organic-Chocolate-Pound/dp/B007S6Y6VS

Pros
  • Very filling!
  • Made from raw & good quality ingredients
  • Easy to prepare
  • No dairy, gluten or lactose and no preservatives or 'nasties'
  • Great if you are in a hurry or sick and don't have time to prepare a meal
Cons
  • As with many healthy, raw based products it is on the expensive side (especially for us Brits)
  • I hated the taste by itself (see below)
  • It is slightly gritty/powdery and very thick
How to deal with the taste/texture and make it drinkable:

The first time I tried it, I made it as directed on the tub, but I didn't use water (they say to use water). Instead I used almond milk and I also just mixed it (as directed). The result was awful: an unpleasant taste AND it was lumpy and thick. I found the portion size was double what I could manage (even though I forced it all down lol!).

They suggest: two scoops of powder & 16 ounces of water. - not good!

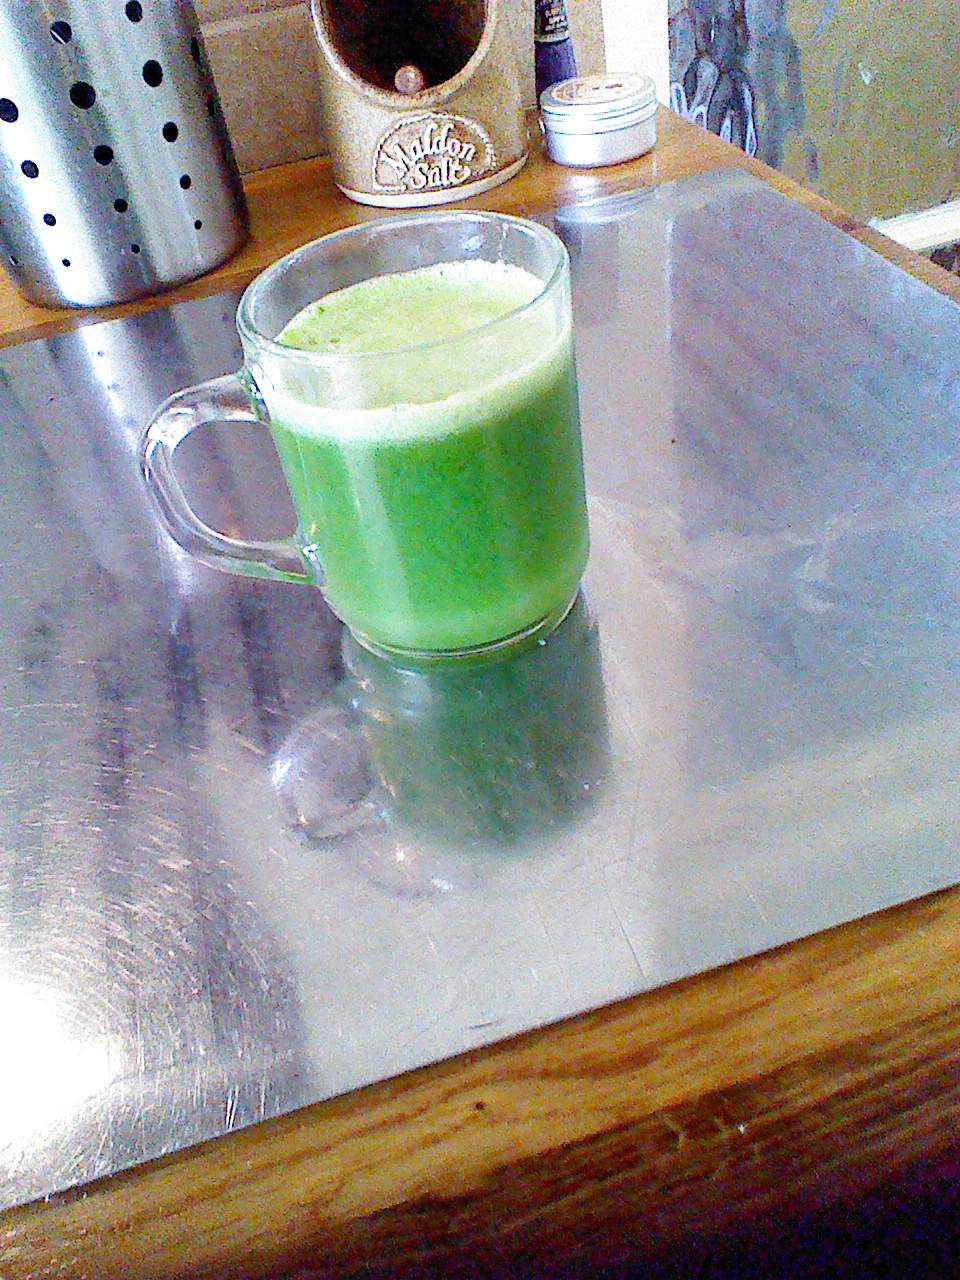
The second time I tried it, I thought about utilising the fact the drink is thick to make a thick shake/smoothie. I tipped 10 ounces of Koko milk (a coconut based milk alternative) into a massive jug, then I added one scoop of powder. I took some vanilla extract and measured about 1/4 a teaspoon and added that. Then I took a small banana and broke it into chunks and added that. I finished this off by using a hand stick blender to blend it up thoroughly so there were no lumps and the banana was mixed in. You could use a blender for this instead.

Once I served it up in a giant glass, I stirred in about 1 fluid ounce more of Koko milk to loosen it up a bit. The result is like you are drinking a different product. It tastes like a thick, chocolatey shake... there is still a very slight powdery/gritty texture to it, but it is totally bearable. Even my mum, who tasted some, agreed that it was fine and she expressed a wish to try a whole shake like that.

So to conclude, I really recommend this raw meal mix if you are someone who struggles to eat healthily or who is struggling with food allergies (and none of your allergens are in the mix), or who has chronic illness to deal with and wants a quick and easy meal replacement that is also healthy.


Tuesday 17 September 2013

Raw Berry Cheesecake

In June I made a raw (no baking/cooking) cheesecake for Father's Day - I used raspberries from my garden; however, you can use any berries you like. This type of option is vegan, so it is perfect if you can't eat dairy! I find it tastes better the next day as the flavours have fully developed.

I have adapted this recipe from Fragrant Raw Vanilla's Raw Strawberries and Cream Dream Cake (http://fragrantvanillacake.blogspot.co.uk/2013/03/raw-strawberries-and-cream-dream-cake.html). I actually made her Strawberries and Cream Dream Cake for my sister's birthday, boy was that cake massive... it was gigantic! I thought it would be nice to use the idea as a base for making something more everyday (i.e. smaller and cheaper!).

Raw Raspberry Cheesecake

Ingredients 

Base -

1/2 cup of pine nuts or almonds or cashews
1/2 cup pistachios
1/2 cup of shredded coconut (dessicated coconut in the UK - ensure no preservatives)
9 or 10 medjool dates (stones removed)


Cheese, Coulis and Topping - 

1 and 3/4 cup of cashew nuts (see note below)
1/4 cup coconut water
1/4 cup of coconut sugar (e.g. TIANA Premium Organic Crystalised Raw Coconut Nectar)
1/4 cup gently warmed coconut oil (I warm the jar over some hot water and then pour some out into my measuring cup)
2 to 3 cups of berries (e.g. raspberries, blueberries, strawberries)
2 teaspoons vanilla extract
1 small piece (e.g. matchbox size) of peeled raw beet (beetroot in the UK)

Method


Important - the cashews must be soaked overnight:
  1. Place the cashew nuts in a glass bowl, cover with cold water, cover with a plate or cling film/saran wrap and leave to soak overnight. 
  2. Drain the soaked cashew nuts and set aside. 
To make the base:
  1. Brush the inside of a 6-7 inch loose bottomed pan with warmed coconut oil.
  2. Place the first 3 crust ingredients together in a food processor and blitz until the mixture looks like breadcrumbs.
  3. Add 9 of the medjool dates to the food processor mixture and process it. 
  4. Take a pinch of the mixture and see if it will stick together when pressed between your thumb and index/pointer finger. If it it is too crumbly, add the 10th medjool date to the food processor and process again. If it already sticks together well, remove the food processor blade and then tip the base mixture into the loose bottomed pan and use the back of a spoon to press the mixture down firmly until it resembles the base of a cheesecake. You may now put this to one side while you make the 'cheese'.
To make the cheese:

  1. Set aside some of the berries for the topping - (estimate how many you will want/need to put on top).
  2. Set aside another 1/2 a cup of berries for the coulis. 
  3. Take the soaked and drained cashews and place them in your clean food processor. Add the coconut water, coconut sugar and the vanilla. Process.
  4. Take a spatula and scrape any unprocessed mixture off the sides of the food processor bowl. Process again.
  5. Add the berries (not including the 2 amounts set aside for the top and the coulis) and beet, and process again.
  6. Take a spatula and scrape any unprocessed mixture off the sides of the food processor bowl. Process again. The mixture should be a uniform colour and look creamy/smooth.
  7. Pour the mixture into your pan on top of the base. Smooth it over with a spatula so the top is even. Set to once side while you make the coulis.
To make the coulis:
  1. Take the 1/2 cup of berries you set aside, and blend them in either a blender or clean food processor bowl with some sweetener of your choice (coconut nectar, or agave etc) to make a coulis. You shouldn't need much sweetner, I add a little and then taste the coulis, before adding more if necessary.
  2. Take the coulis and spoon it over the top of the cheesecake. It should just cover it - you may need to smooth it over a little.
Topping:
  1. Now take the whole berries you set aside. If you have strawberries you may wish to halve/quarter or slice them - for raspberries and blueberries you can keep them whole. Neatly place the berries on top of the coulis so that you have a berry topping - see the picture at the top of this recipe.
  2. Carefully put the cheesecake pan on a plate, then cover the pan with another plate to protect the top of the cheescake. Place the whole thing in the freezer for at least 4 hours so it can set.
To Serve - 

Remove the cheesecake from the freezer and allow it to defrost for 10 to 20 minutes. Take a spatula or other thin knife, and run it around the edge to loosen the cheesecake from the sides of the pan. Have a serving plate ready and preferably someone else to help you: as you press upwards on the loose bottom, the pan will come loose so it helps to have someone else to grab that while you hold onto the bottom of the pan/cheescake. Once you have put the cheesecake on the plate, allow to soften (defrost) further before eating... everyone has their own preference at which stage of defrosting they prefer the cake. I find it tastes better the next day as the flavours have fully developed.

Enjoy!


An Update: Elminitation Diet and More Allergies?

As I haven't had time to post for a while, I thought I would update what's happening with me and food...

It appears, I may have developed more than just an allergy to onions, so I am currently on an elimination diet. At the moment I have cut out:
  • Gluten
  • Wheat
  • Spelt
  • Rye
  • Oats
  • Corn
  • Soy
  • Garlic (I was eating this occasionally in small amounts)
  • Dairy
  • Peanuts
  • Legumes and beans - lentils, chickpeas and canned/dried beans
  • Nightshade family - tomatoes, bell peppers, potatoes and eggplant/aubergine
  • No premade sauces & no coated anything (e.g. coated fish)
I am continuing to eat eggs and yeast, though I may try elminating them at a later date.

I feel a lot better now I am eating very restrictively - something or some things in that list of foods was making me ill. What made me suspect it was food related is that I was only getting the symptoms after I ate certain meals, but I couldn't figure out what was in those meals that was causing me to be severely unwell.

The premise behind the elimination diet is that you come off all common allergens. In the case of someone who suspects a more unusual allergen, you just choose to also not eat that (e.g. I have stopped the garlic). From what I have read it seems most people do an elimination diet for 5 to 10 days, after which you start to 'challenge' foods. In the case of gluten, it is common to stay off it for longer - e.g. 1 month.

Challenging Foods -

After eliminating the common allergens for the elimination period, one then takes a food a day from the list of avoided foods, and eats some of it in it's purest form. For example, if one wants to challenge wheat, it is not a good idea to eat bread because bread contains other allergens (such as yeast). Instead, it is better to try eating something that is wehat only like wheat flakes cereal, or if one wants to challenge corn, then sweetcorn or cornflakes. Once you have eaten a small amount of it, you then observe whether any of your allergy symptoms arise. If not, then you can add that food back into your diet. If you do exhibit symptoms, then it is likely you are either allergic or intolerant and you should eliminiate that food permanently from your diet.

I am on day 3 of the elimination period, so I won't be challenging just yet. I need to challenge these:
  1. Corn
  2. Goat's milk
  3. Butter
  4. Cheese (hard) - cow, sheep and goat
  5. Wheat
  6. Cheese (blue) - cow
  7. Oats
  8. Peanuts
  9. Soy (I need to get soybeans)
  10. Cheese (cream/white) - goat and cow
  11. Yoghurt (plain) - cow
  12. Rye (I need to get ryebread - the pumpernickle type... and check if it is just rye, I think it is)
  13. Cow's milk
  14. Nightshade family
  15. Lentils
  16. Other legumes/beans
I will try spelt at a later date - as I don't eat it much anyway. Garlic - I am not sure what to do about.. I guess I need to try it, but I am scared! 

Saturday 27 April 2013

Easy Green Juice

I really love to juice, well not the actual process so much as the end result; put it this way, I hate the washing up generated by juicing, but I love the results of drinking juice.

Delicious and Healthy Green Juice
I am lucky to be able to use my family's masticating juicer. I always drink my juice fresh from the juicer. If you have a centrifugal juicer, it is especially important to make sure to drink any juice you make within 15 minutes of making it so as to get all that juicy nutritious goodness in you before it starts to oxidise.

In my humble opinion and juice-drinking experience, green juice has a profound effect on the body. I do like other types of juice too and will probably feature some other recipes for juice, but green juice is my go to staple.

I nearly always add a teaspoon of green powder to my green juice. My favourite powder is barleygrass, but I also use wheatgrass and some people like spirulina. You can find these types of powders online or in health food stores. I find barleygrass powder is particularly helpful if you are chronically sick and need some 'support'.

Naturya - barleygrass powder, they also make other green powders
The recipe below is a basic recipe. There are more complicated versions using more ingredients, but this one tastes fairly mild (I don't really like the taste of green juice!), and is simple to prepare. It's also fairly easy to keep these ingredients on hand without breaking the bank.

Juice quanities always vary depending on the actual vegetables/fruit used, but this recipe should make 2 medium glasses or 3 small ones.

Ingredients:

3 large stalks of celery
2 or 3 large green apples - Granny Smith works well or for a sweeter juice use Golden Delicious or similar
3 large handfuls spinach
1/2 lime, squeezed - you can also put the lime into some juicers
1 teaspoon per person of barleygrass powder
Optional - 1 inch peeled ginger

  1. Prepare the fresh ingredients, if necessary. For a masticating juicer, you will probably need to chop the celery and apples.
  2. Juice everything except the barleygrass powder and lime juice.
  3. When you have juiced everything, add the lime juice to the juice container and stir in.
  4. Pour the juice into glasses and stir 1 teaspoon of barleygrass powder into each person's juice.
  5. Drink straight away.
  6. Follow with a glass of water to help flush it through your system.

Tuesday 16 April 2013

Marinated Salmon

This is a fairly easy recipe, which can be made in advance, kept in the fridge and cooked later. The garlic, soy sauce and ginger, are all optional. 

It makes a good main meal if you like fish. I served it with white basmati rice and steamed vegetables (pak choy, broccoli and courgette/zucchini).  You could serve it with potatoes, or noodles and/or salad.


I cooked the salmon in the oven, but you could cook them on a BBQ/grill if you wished.


Ingredients:

4 salmon fillets (wild are good)
Vegetable oil
2 cloves garlic
3 tablespoons runny honey
1 1/2 teaspoons Tamari (soy sauce)
Juice of 1 lime
1/2 bunch fresh coriander (equal to about 1/2 cup chopped)
1 inch fresh ginger
  1. Preheat the oven to 180C/350F - unless you are preparing the salmon/marinade on advance.
  2. Line a baking tray with tin-foil and brush the foil with some vegetable oil.
  3. Place your salmon fillets on the oiled foil, skin side down.
  4. Take a small saucepan and add the garlic, honey, Tamari/soy sauce, lime juice, chopped coriander, and ginger. Stir well.
  5. Heat up the contents of the pan on the stove top, until the liquid is warm (approx. 5 minutes).
  6. Remove from the heat and pour over the salmon fillets. Leave them to marinate for 10 minutes or longer - depending upon how much time you have, as you can cover them and put them in the fridge for a few hours pre-cooking. During this time, keep spooning the liquid back over the salmon fillets (basting them). 
  7. When you are ready to cook them, place the tray in the pre-heated oven and cook for 10 minutes, then remove it and baste them using a spoon to cover them in any remaining marinade. Put them back in for a further 5 to 10 minutes, depending on thickness (use a knife to check they are cooked through the centre).
  8. Serve with rice or noodles and salad or steamed vegetables.

Monday 15 April 2013

Onion-free Carrot and Celeriac Slaw

Back in the day... pre-onion allergy, I used to LOVE homemade coleslaw. I would eat it in sandwiches, with salad or tucked with some cheese in a jacket (baked) potato. Store bought coleslaw was never the same as the homemade variety (it was a bit artificial-looking and tasting). Then Marks and Spencers and other supermarket started making 'deli' coleslaw that was a pretty spot on replica for something you might make yourself, and thus... life was good!

Alas, most coleslaw includes a hefty heaping of raw onion, which is really one of the worst presentations of onion I could come into contact with. I had to abandon eating it and focus on something else instead. I was a bit miffed. Then one day, I was thinking about the whole issue - I missed one of my favourite foods - and I remembered that in Switzerland, they make a grated celeriac dish that comes in a creamy sauce. This memory prompted me to make my own 'slaw', the recipe for which you will below.

Carrot and Celeriac Slaw on Wholemeal Bread with Cheese and Quorn Slice
Notes: this is one of those dishes you can guess/estimate the quantities needed. Just taste as you go along and see what you think. If you want more 'sauce' add more mayonnaise/Veganaise. The picture I have included is of when I made it and was watching my weight - so less sauce. It is important to leave the slaw to develop for at least half an hour (the longer the better), as some of the juices from the vegetables seep out into the sauce. The slaw will keep in the fridge for a few days. It has a far milder taste that traditional coleslaw due to not using white cabbage or onion.

Ingredients:

Between 1/4 to 1/2 a celeriac, shredded - quantity depends on how much you want to make. I shred/grate mine using the food processor.
Equal quantity of carrot, shredded
Mayonnaise or Veganaise - approx 1 to 2 tablespoons, or more if you want more sauce (you can thin it with milk or milk substitute if necessary).
Lemon juice - a good squeeze or 2
Kelpamare or Maggi, a good shake - I use Kelpamare (http://www.avogel.co.uk/food/kelpamare/) as it does not have MSG in it.
A pinch of sugar - optional, taste before you add... it helps to counteract the lemon juice if it is a bit sharp.
Optional extras: chopped walnuts or pecan nuts, raisins or sultanas (to get them plump and soft, cover in boiling water, then discard the boiling water before use), chopped apple, chopped fresh parsley.

  1. Use a large mixing bowl to combine the shredded celeriac and carrot. If you are using any of the optional extras such as nuts, sultanas or apple then add these now.
  2. Add the mayonnaise/Veganaise, the lemon juice, and the Kelpamare/Maggi to the bowl.
  3. Mix thoroughly together using a large spoon.
  4. Taste the mixture and add more of the Kelpamare/Maggi, if needed. Add the sugar, if needed.
  5. Taste again - adjust if necessary.
  6. Cover the bowl with a plate or some clingfilm/saran wrap and leave for 30 minutes.
  7. Serve. Any unused slaw can be stored in the fridge in a covered container for up to 3 days. 


Wednesday 3 April 2013

Veggie Rolls

Veggie rolls are a great way of making a quick, and surprisingly very filling meal. They are full of nutrients due to the ingredients used, and the fact that nearly everything used is raw. They follow the principles of the Hippocrates Diet, which is a 'living food' way of eating. They are an ideal item for a picnic or lunchbox. I have not included quanitites for most things, as you can make it up.

Raw Veggie Rolls

Alternatives: there are plenty of alternatives you can use such as chopped tomatoes, salad leaves, chopped/grated/shredded zucchini/courgette...

Ingredients:
  • Raw or toasted nori sheets - http://www.clearspring.co.uk/japanese/sushi_range/nori - I use 1 or 2 sheets per person
  • 1/2 avocado - per person
  • Lemon juice or apple cider vingar
  • Sprouted seeds - alfafa, brocoli, mung... or whatever else you have sprouted/bought (you could use cress if you don't have any sprouts)
  • Cucumber, grated/shreeded or finely julienned
  • Carrot, grated/shredded
  • Bell pepper (any colour), finely sliced into strips
  • Seasoning
  • Tamari - optional
  1. Take a sheet of nori and lay flat on a plate or clean surface
  2. Peel the avocado half/remove the stone, and roughly chop it into a small bowl 
    Spread on the avocado paste
  3. Take the seasoning, and lemon juice or apple cider vinegar, and add this to the avocado (you should add it 'to taste' - everyone likes a different amount, so add a little, taste it and then add some more if necessary)
  4. Using a fork, mash the avocado mixture to incorporate the seasoning and the lemon juice/vinegar until it makes a paste
  5. Divide the nori sheet into 4 squares
  6. Spread the avocado paste onto each square (you may wish to leave a little sheet spare at the top for rolling, I didn't bother!)
  7. Top the avocado paste with the grated/shredded cucumber and carrot
  8. Then add the sprouts, followed by the bell pepper
  9. Roll up your squares (if you left some of the sheet spare, then you can moisten it with water to make it stick to the rest of the roll
  10.  Plate up - and serve with tamari dipping sauce or simply by themselves
A close up of the filling
Raw veggies, seaweed and avocado - yum!

German Marble Cake

I don't want to turn this into a baking blog, so I shall upload something savoury too; however, by popular request I am posting the following recipe as it is divine!


Background: I like to bake and recently it was a relative's birthday, so I decided to make them a birthday cake. In the past, I have made them the usual (for England) victoria sponge and the more exotic coconut and lime malibu cake, but this time I was reading a German magazine and noticed a lovely looking recipe for a marble cake.

Marble cake is pretty popular in Germanic countries. In the past I have bought a pre-made cake from certain German supermarkets, who shall remain nameless; along with 'the nasties' (additives/preservatives etc), they always seem to have a strange flavouring that I can't stand and is perhaps synthetic. I had always thought this type of cake would be a hassle to make because you end up with two cake batters at one point, but I was proven wrong. It really is not that bad - apart from washing up two bowls instead of one.

The theory behind this cake being that it should be more vanilla sponge and less chocolate sponge; I seem to have ended up with them being pretty equal. I shall alter it slightly next time, but it really doesn't matter that much. I have altered the amount of white and dark chocolate used for the topping because the original recipe had too much dark to white in my opinion (you can change it as you desire).


Ingredients:
250g soft/room temperature butter or margarine = 1 cup
1 pinch salt (I omit this)
200g sugar (I use caster as I am in the UK) = 1 cup
1 tsp vanilla extract
4 eggs (I used medium)
300g self raising flour = approximately 2 1/3 cups - for all purpose plain flour use the same amount of flour but add 3 teaspoons of baking powder and mix it before use
150g creme fraiche = 2/3 cup
2 dessert spoons of cocoa powder (the type of spoon you eat cereal with) = approx 4 teaspoons
3 dessert spoons of milk or milk substitute
75g of dark chocolate (2.5 ounces will do)
75g of white chocolate (2.5 ounces will do)
  1. Oil or grease (with butter/margarine) a large loaf tin. Mine measured 25 cm long, so approximately 9 to 10 inches long would be ideal.
  2. Preheat the oven to 175 C/350 F (conventional) or 150 C/300 F (fan).
  3. Take the butter, salt (if using), and sugar and cream together in a mixing bowl using a wooden spoon or electric beaters. When the mixture is pale and fluffy/creamy, add the eggs one at a time, beating to incorporate each one thoroughly. Add the vanilla extract and gently stir to combine. 
  4. Using a metal spoon, add the flour (and baking power, if using), and fold it into the mixture. Add the creme fraiche and fold this into to loosen up the mixture.
  5. Take another mixing bowl and remove between 1/2 the mixture. You should now have two bowls with mixture in them.
  6. Use a sieve or flour sifter to add the cocoa powder to the mixture, at the same time add the milk and fold the two ingredients into the mixture with a metal spoon (be careful not to overmix/beat as you will lose some of the air).
  7. Take the vanilla/yellow cake mixture and add it to the loaf tin, then add the chocolate/brown cake mixture on top. Smooth with a knife and then take the handle of a spoon and swirl it through the mixture from one end to the other in a continual wiggly 'S' shape - this gives you the marbling of the two cake mixtures.
  8. Bake for between 50 to 60 minutes. I checked mine at 45, and then again at 55. The cake is ready when you can insert a skewer into the cake and it comes out clean with no mixture stuck to it. 
  9. When cooked, remove the cake from the oven and leave to stand in its tin for 5 minutes.
  10. Loosen the cake with a palette knife and turn it onto a wire rack to cool.
At this point you can just eat the cake as it is, or you can make it even more special by following these steps:
  1. Melt the white chocolate and dark chocolate separately - I use a bain marie/porringer pan.
  2. Drizzle the dark chocolate first over the cooled cake - I used a palette knife to smooth the extra dark chocolate over the sides.
  3. Then drizzle the white chocolate over the cooled cake, taking care to fill in any gaps on top where you did not put dark chocolate. If you wish, you can then take a wooden cocktail stick and use it to drag vertical lines the length of the cake, which will give your cake a marbled topping.
  4. If possible, carefully leave put the cake in the fridge to 'set' the chocolate, otherwise just leave it for a few hours or more so the chocolate can cool right down.
Recipe adapted from: Neue Post Magazine 20 March 2013

Saturday 30 March 2013

One Bowl Banana Loaf Cake


This loaf cake is one of my favourite ways of using up bananas that are too ripe for me to eat raw. Not only is it easy to make as you really only use one big mixing bowl, but the finished product tastes very moreish. It will keep for a few days in an airtight container.

Apologies for poor picture - was not thinking when I took this!

The original recipe is Australian, so I have had to convert it as the British and US cup sizes are different. This means the quantity of flour is in 2 measurements/parts and I have converted the fat measurement to cups (57g = 1/4 cup, so 60g is just a smidgen over).

Alteration Notes - For a kosher cake, this recipe could be made with oil. For a vegan cake, you could use vegan margarine and an egg substitute (http://vegetarian.about.com/od/vegetarianvegan101/f/eggsubstitute.htm). The sugar can be subbed with an alternative sweetener such as agave, honey, stevia etc. To make it 'healthier' you can use wholewheat/wholemeal flour, or an alternative flour such as spelt.

To spice things up you can always add a teaspoon of mixed spice or cinnamon instead of the vanilla extract. You could also add a handful of chocolate (chips or chunks) or nuts (pecans or walnuts would work well). In fact, now I think about it, hazelnuts and chocolate chips would work well; I might have to try that!

Ingredients:

60g butter or margarine. I checked and it is about 1/4 cup.
3/4 cup sugar
1 teaspoon vanilla extract
2 ripe or very ripe bananas, well mashed
1 egg, lightly beaten
1 1/4 cup AND 2/3 cup of self raising flour or all purpose plus baking powder (for how much baking powder try- http://answers.yahoo.com/question/index?qid=20090103151224AAFSLH2). I used 1 1/4 cups wholemeal and 2/3 cup spelt flour.
2/3 cup of milk or milk substitute (almond, oat, rice, coconut or soya milk)
  1. Preheat oven to 180 C or 350 F (a fan oven would need to be about 10 to 20 degrees less hot). Brush a loaf tin with a fine coating of melted butter or oil. Coat the base and sides with flour and shake off the excess.  
  2. Beat the butter and sugar in a large mixing bowl using electric beaters or a wooden spoon. When the mixture is light and creamy, add the mashed banana and beat to incorporate. Slowly beat the egg into the mixture. Add the vanilla extract and stir the mixture to combine it. 
  3. Sift some of the flour (and baking powder if you are using it) into the mixture. If you are using a flour with the bran still in it, then shake that into the mixture after you have sieved the flour, as otherwise it will remain in the sieve. Using a metal spoon, fold the flour into the mixture. Add some of the milk to the cake mixture and gently combine. Follow with more flour, fold it into the cake mixture and then add more of the milk. Repeat until you have added all the flour and milk. The mixture should drop from the spoon when you hold the spoon above the bowl, if it does not, add a little more milk. 
  4. If you are adding chocolate or nuts then add them now and stir to combine.
  5. Pour the mixture into the tin and smooth the surface. 
  6. Bake for 45 minutes. Test whether it is cooked by using a skewer to pierce a tiny hole in the cake - if it is cooked, the skewer will come out clean, if it is not ready the skewer will be 'wet' with cake mixture. 
  7. When the cake is ready, remove it from the oven, and leave it in the tin for 5 minutes before turning it out onto a wire rack. 
You may choose to top the cake with lemon icing or to serve it sliced and buttered. I usually eat it plain with a cup of tea!

Recipe adapted from: Scones, Muffins & Teacakes by Murdoch Books